 Upworks Inc partners with ABOTTS to build their Oracle Cloud Infrastructure (OCI) and migrate their custom applications to OCI.
 Abotts Inc Partners with Gnorth consulting to deploy exadata and ODA for a large public sector customer.
What are Github actions
GitHub Actions is a powerful automation tool built into GitHub that lets you define workflows that run when certain events occur in your repository like pushing code or opening a pull request.
Key Terms You Need to Know
| Term | Meaning |
| Workflow | Its a YAML file that defines automation. |
| Job | A set of steps that run in the same environment. |
| Step | An individual task like run a command or use an action |
| Action | A reusable piece of automation code like set up Python, login to Docker. |
| Runner | A server that runs your workflow which GitHub provides for you |
How to set up your workflow using github.
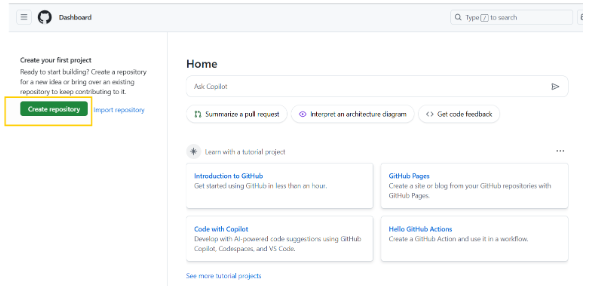
Step 1: Create a GitHub Repository
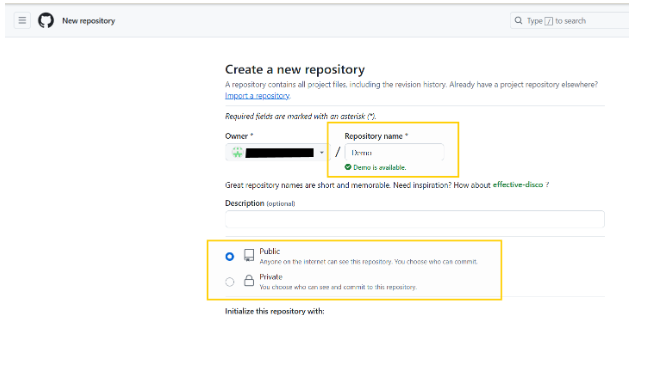
Go to github.com and create a new repository.
Name it as per your need. And select the type of repo you want to maintain, like public or private.
Also provide a description if needed.
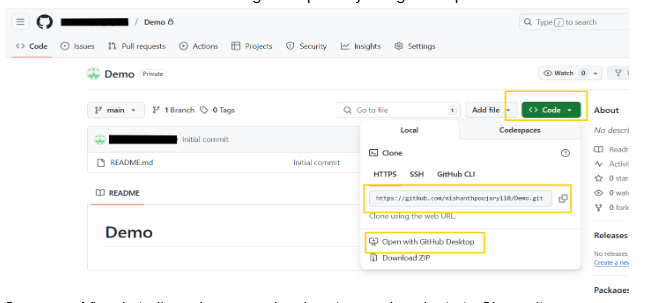
Step 2: Clone the newly created github repo to develop your repo and code locally. (Optional)
- You can copy the clone URL from the github website. Or you can directly download the clone using the Open with Github desktop button.
note : here we are cloning the repository using the http URL.
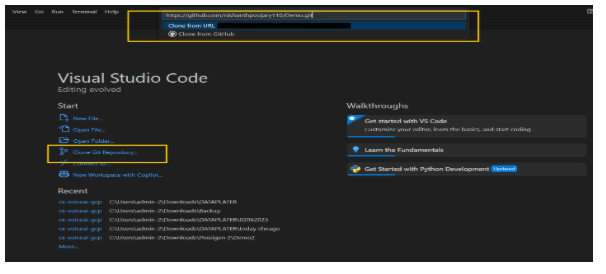
- Open your Visual studio code on your local system and navigate to Clone git repository option and paste the http URL in the search bar and hit enter to clone the repository in your local system.
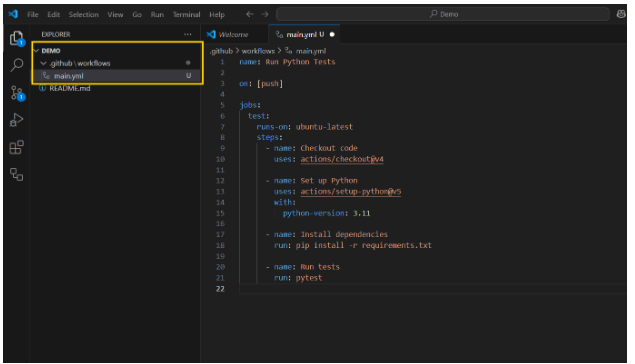
Step 3: Add a Workflow File
In your local repository create a folder called .github/workflows
Within that folder, create a file called main.yml
Here the main.yml file will contain your automation code.
For example here we have built a code to run Python tests automatically every time you push code.
These codes are nothing but your github actions where you instruct github step by step procedures to work on.
In the main.yml code given above here are some of the key points.
name: Run Python Tests
Names the workflow “Run Python Tests”. This name appears in the GitHub Actions tab of your repository.
on: [push]
It tells GitHub to run this workflow whenever you push code to the repository (any branch).
jobs:
test:
runs-on: ubuntu-latest
Defines a single job called test that will run on GitHub’s Ubuntu runner
steps:
– name: Checkout code
uses: actions/checkout@v4
– name: is used to label a specific step.
In this step, It checks out your repository’s code into the runner so the rest of the steps can access it. This is almost always the first step in any workflow.
– name: Set up Python
uses: actions/setup-python@v5
with:
python-version: 3.11
Installs Python 3.11 on the runner using the official setup-python action.
You can change the version here depending on your project requirements.
– name: Install dependencies
run: pip install -r requirements.txt
Install the Python packages your project depends on, listed in requirements.txt.
This is required before running any code that uses third-party libraries.
– name: Run tests
run: pytest
Run your project’s test suite using pytest, a popular Python testing framework.
If tests fail, the workflow will be marked as failed.
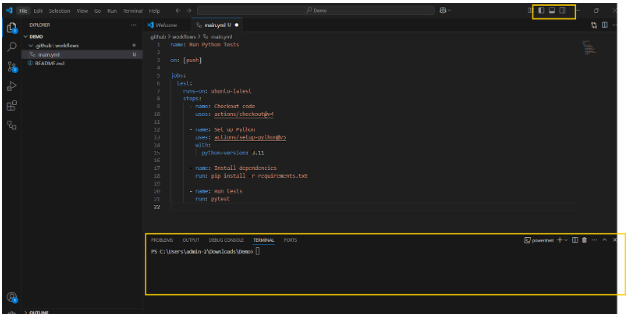
How to save your code in local and upload to github using github commands.
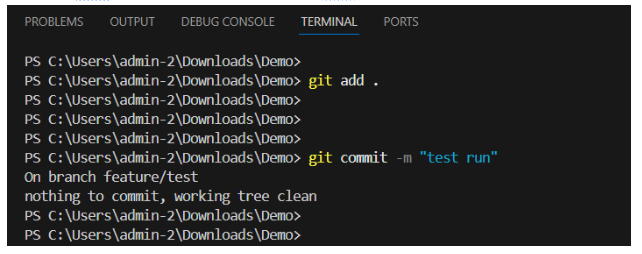
In your local Visual studio code open powershell terminal as shown.
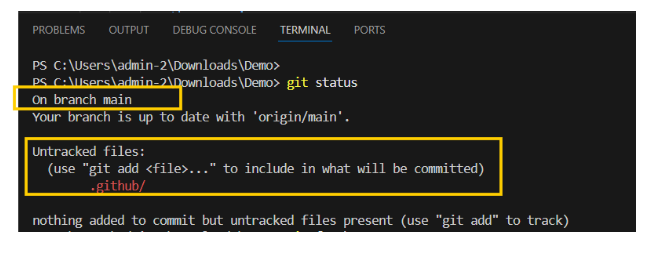
To check the status of your local repo use the command
git status
Which will show you in which branch your currently on and the uncommitted files in the folder as below.
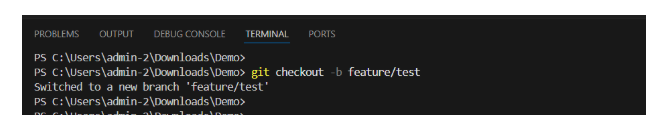
Now create a feature branch to save all your changes and move to the newly created branch from the current (master) branch.
git checkout -b feature/newbranch_name
In which checkout -b means moving from your current branch to the new branch.
Here feature/test is our new branch name.
Now use git add .command to stage all changes in you current branch. And use git commit to commit your changes.
git add .
git commit -m “add your comments”
Here the -m” “ represents the comment you what to add while saving your changes.
Then User git push origin head command to push the changes to your remote repository in github

How to raise a PR (Pull request) in Github.
Login to Github.
If any changes in the pushed file is there, then github will automatically notify to compare and raise a pull request as shown below.
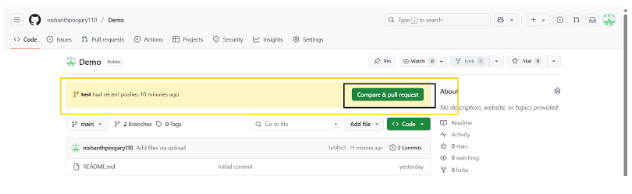
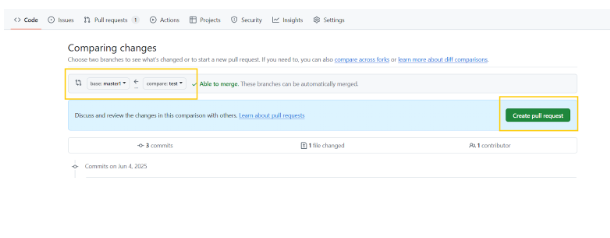
To manually Raise a PR, go to Pull request section and click on new pull request.

Then select the feature branch (your branch with new changes) as source and target to master or any other branch you need to do changes. And click on create pull request to create a PR
Once the PR is raised, you will see the merge option as below to merge your latest changes.
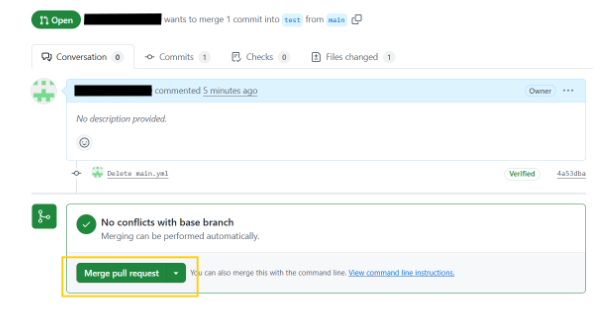
Once the merge pull request option is selected a Github action will start running to make the change which you added in your Yaml file.
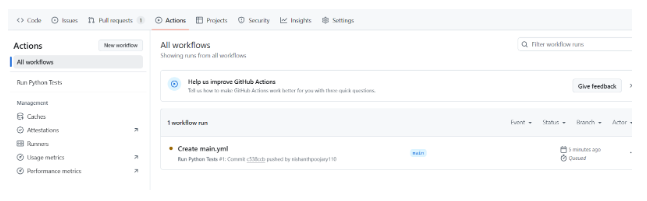
In the Github action tab a Action will run which will run the steps you have mentioned in your main.Yaml file. Performing the steps specified in the file.