 Upworks Inc partners with ABOTTS to build their Oracle Cloud Infrastructure (OCI) and migrate their custom applications to OCI.
 Abotts Inc Partners with Gnorth consulting to deploy exadata and ODA for a large public sector customer.
Setting up the JDBC Driver 3.14.4
Download the Snowflake JDBC Driver 3.14.4 :
Before setting up the integration, you need the Snowflake JDBC driver, which acts as a bridge between ODI and Snowflake. You can download it from:
- Snowflake Documentation: JDBC Driver Download
- Maven Repository: Snowflake JDBC Maven Link
Ensure you have the latest version of the driver to avoid compatibility issues.
Configuring Snowflake JDBC Driver 3.14.4 in Oracle Data Integrator Library userlib/ directory:
Here copying the snowflake jdbc 3.14.4.jar to userlib and removing the snowflake jdbc 3.19.1 jar file.

Configuring Snowflake JDBC Driver 3.14.4 file in ODI agent lib/:
Here copying the snowflake jdbc 3.14.4.jar to lib and removing the snowflake jdbc 3.19.1 jar file.

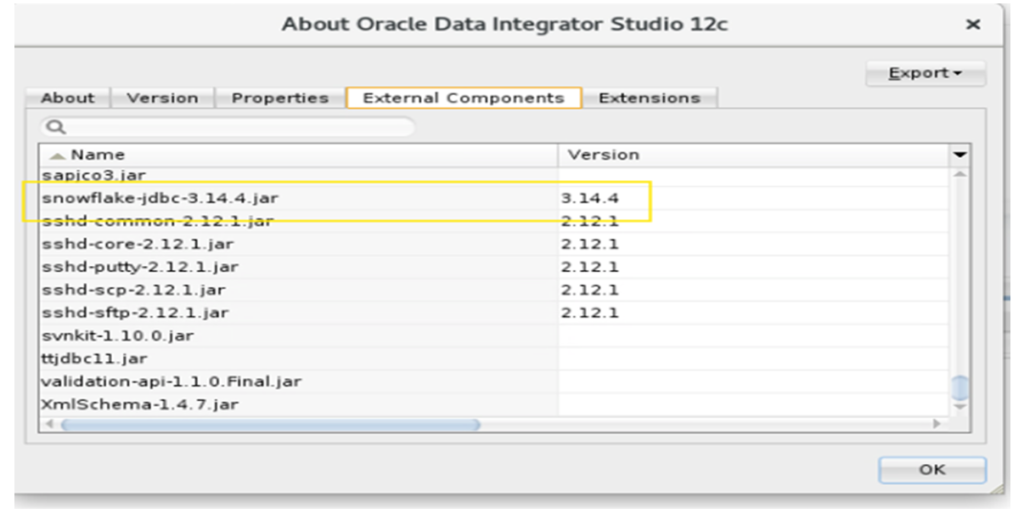
Checking the Snowflake JDBC Driver version in the Oracle Data Integrator:
The images show the Oracle Data Integrator (ODI) application interface. It displays the “About Oracle Data Integrator Studio 12c” window, which provides details about the ODI software version and components.
The key details shown are:
- Version: 3.14.4
- Name: snowflake-jdbc-3.14.4.jar
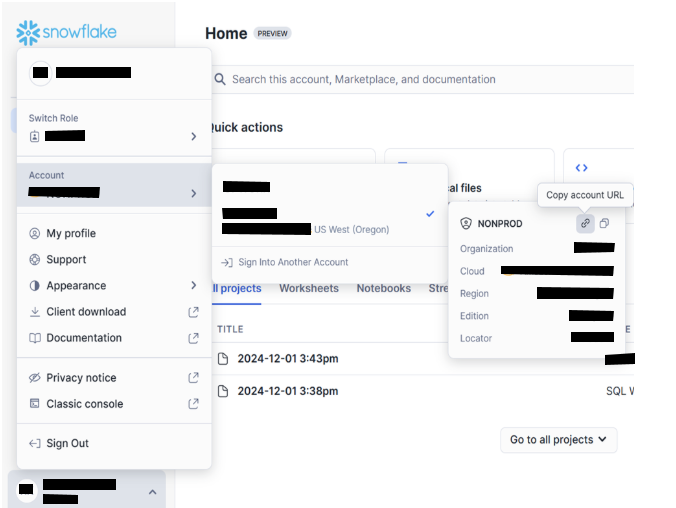
Retrieving Account information for Snowflake Connection Setup
The image involves retrieving the Snowflake account details necessary for configuring a connection in tools like Oracle Data Integrator (ODI).
The details include:
- Account URL: The full Snowflake account URL (e.g., for JDBC connection).
- Account Context:
Organization: org , Cloud Provider: AWS (Amazon Web Services).Region: US West (Oregon). Edition: Enterprise. Locator: A unique identifier for the account.
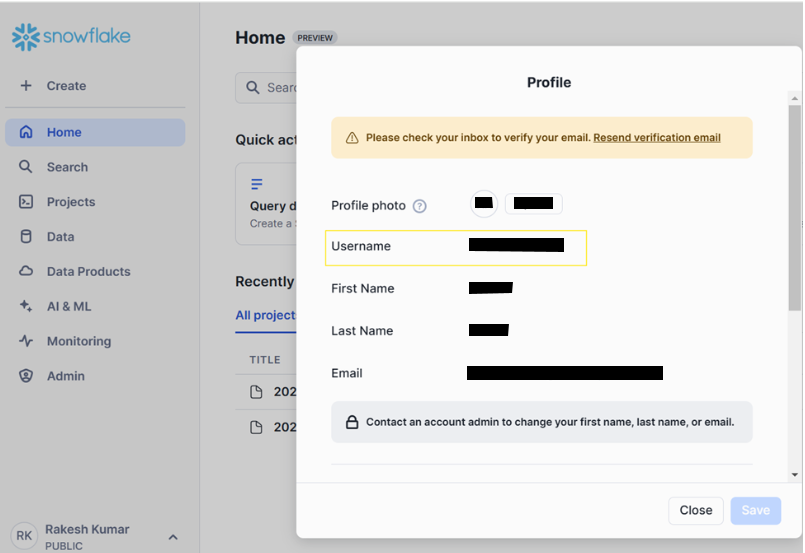
The below images are directed to the My Profile tab and show the username and email ID.
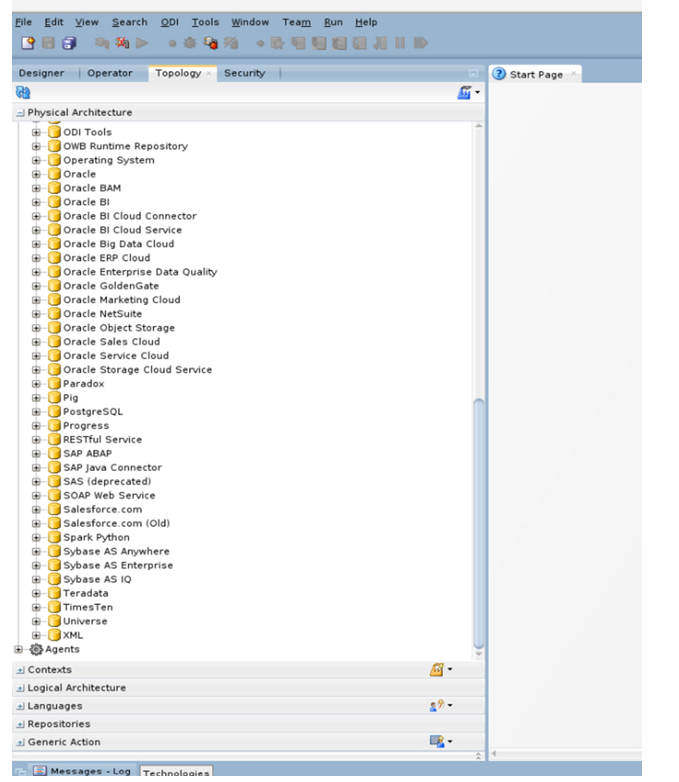
Creating a new topology for Snowflake 3.14.4:
Topology tab in Oracle Data Integrator (ODI). The Topology Manager is used for defining the physical and logical architecture of your data integration project.
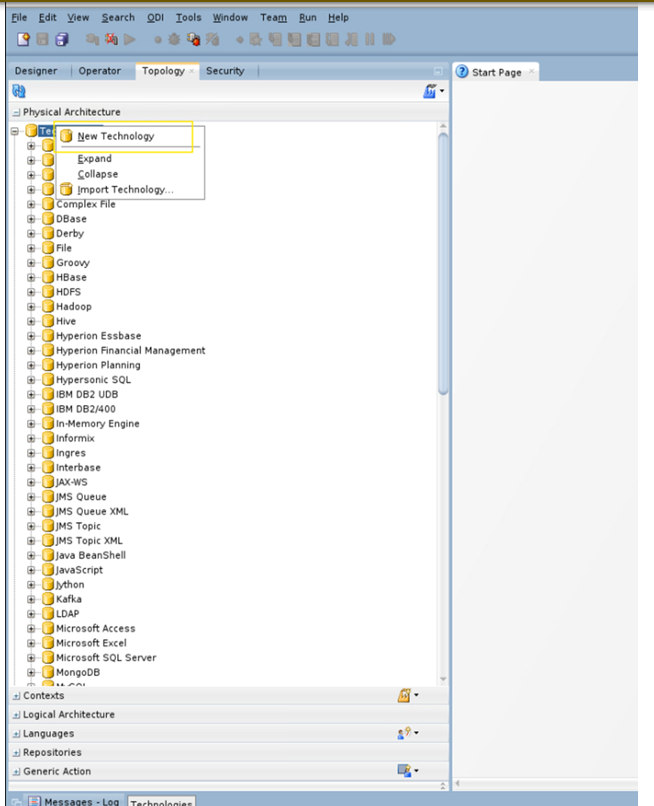
Configuring the new Technology:
Choosing the Physical Architecture
Adding a New Technology in Oracle Data Integrator (ODI):
The Topology tab in Oracle Data Integrator (ODI) is specifically under the Physical Architecture section. It highlights the process of adding or managing technologies in ODI.
Creating or Duplicating a New Data Server for Snowflake 3.14.4
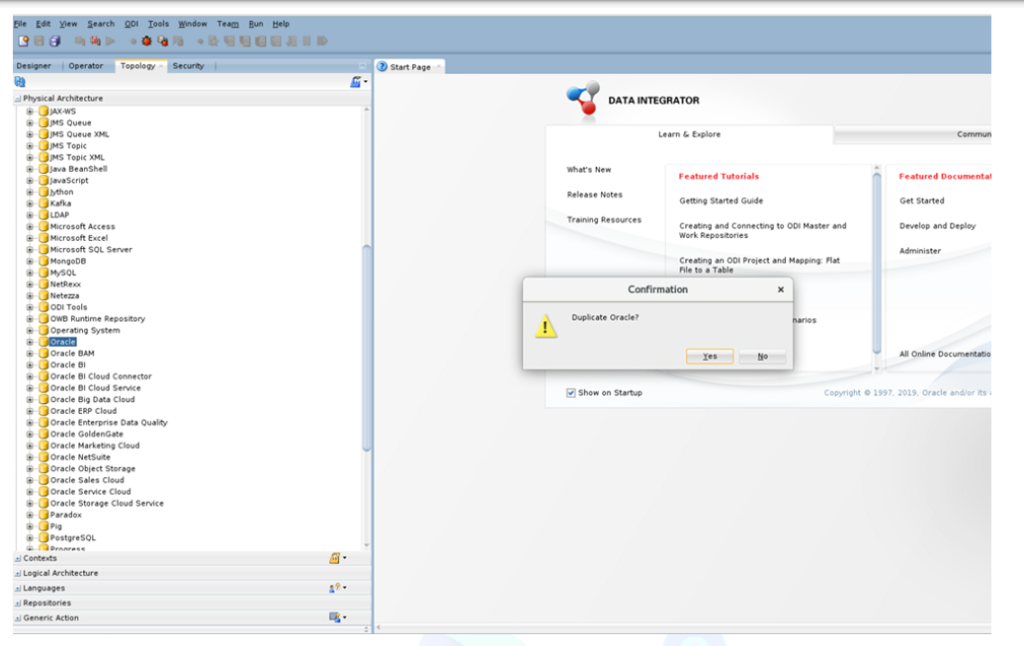
The Topology tab in Oracle Data Integrator (ODI) is under the Physical Architecture section. It shows the context menu for a selected technology, likely Oracle in this instance.
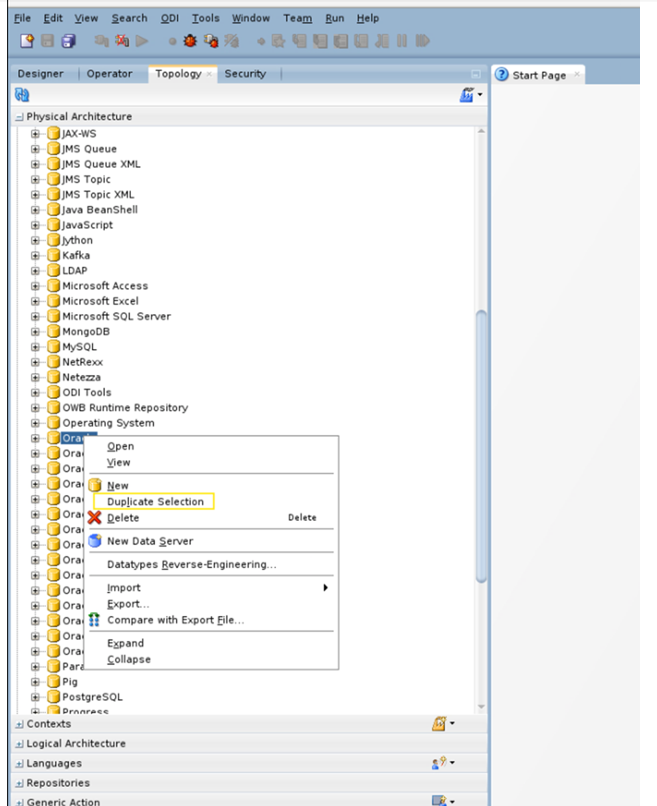
Confirm it by selecting Yes in the “Duplicate Oracle?” dialog.
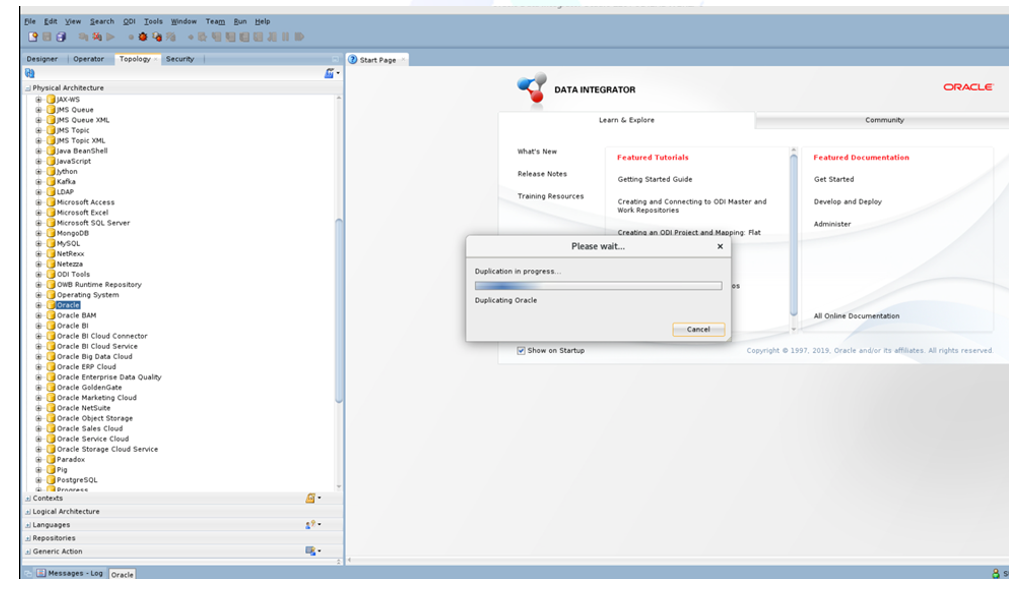
choose the Yes option to create a new snowflake topology.
Observe the progress bar as the process is initiated
Reviewing and Modifying the Snowflake topology in ODI
Examine and adjust the properties of the Snowflake configuration for proper usage.
Name tab as a snowflake
Code tab as SNOWFLAKE
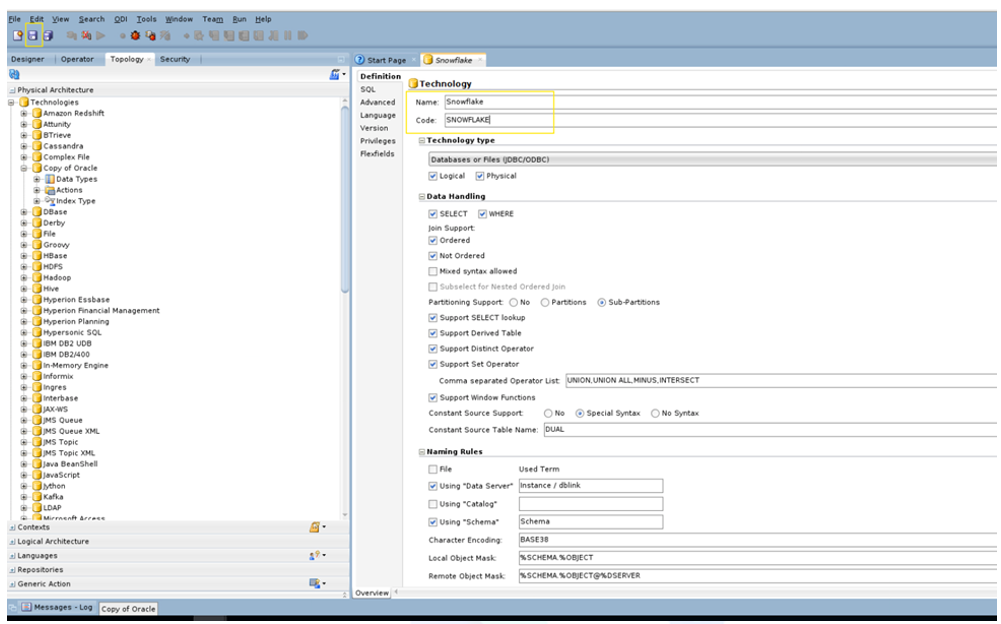
Configuration of name and code in the Oracle Data Integrator (ODI)
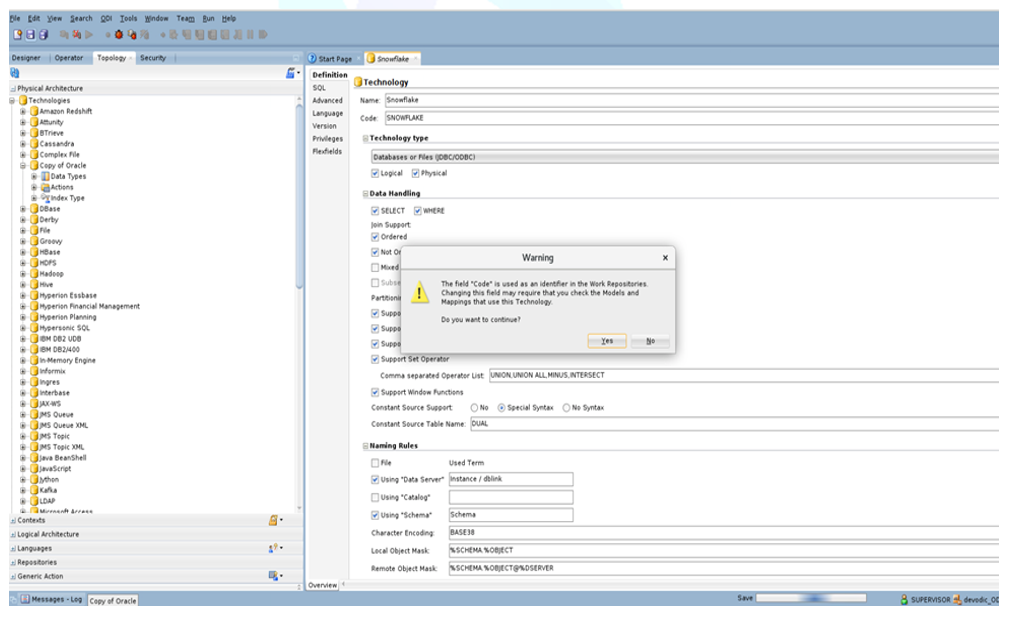
After making changes press the Yes tab in the pop-up window.
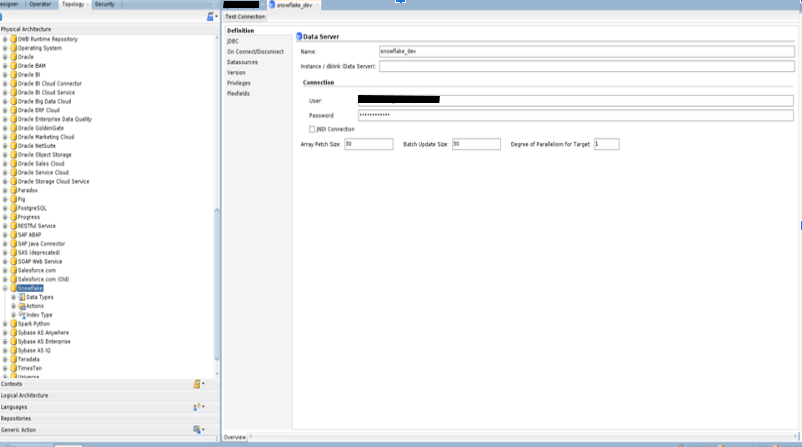
Configuring the Snowflake 3.14.4 Data Server in Oracle Data Integrator(ODI):
The Snowflake Data Server configuration in ODI allows you to connect ODI to Snowflake as a source or target for data integration tasks.
Configure the Data Server
In the Data Server configuration screen:
- Name: Provide a meaningful name for the data server, e.g., snowflake_Dev.
- Technology: Ensure it is set to Snowflake.
- User: Provide proper valid-user
- Password: provide a proper valid password.
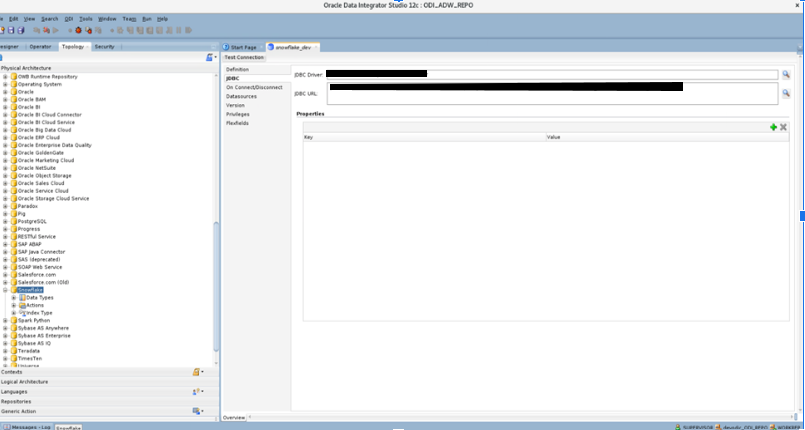
JDBC configuration for Snowflake Data Server in Oracle Data Integrator(ODI)
To integrate Oracle Data Integrator (ODI) with Snowflake, configuring the JDBC connection is crucial. This step ensures that ODI can establish a secure and efficient connection to the Snowflake database using the Snowflake JDBC driver.
Snowflake Account Information:
- Account name (e.g., <account_name>)
- User credentials (username and password)
- Database, schema, and warehouse information
Configure the Data Server Details
Name: Provide a meaningful name for the data server (e.g., Snowflake_Dev).
JDBC Driver: Enter the driver class name:
net.snowflake.client.jdbc.SnowflakeDriver
JDBC URL: Enter the JDBC URL for Snowflake.
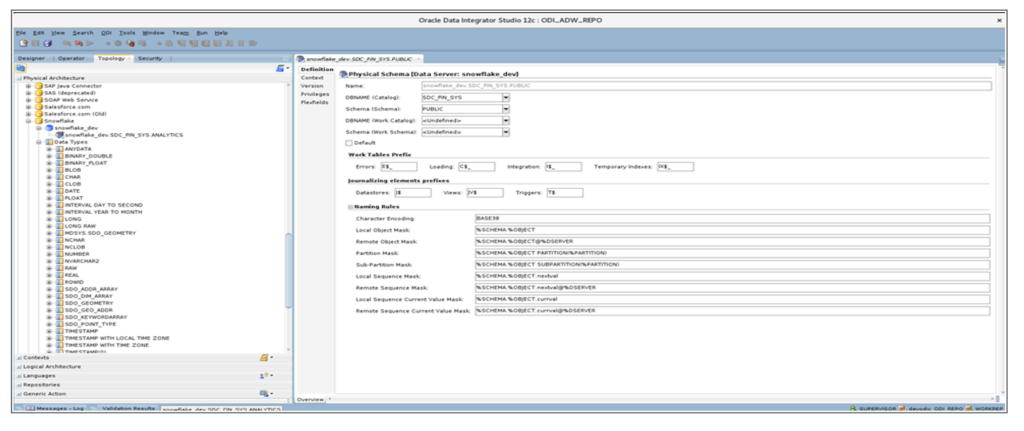
Configuring Snowflake Physical Schema in Oracle Data Integrator (ODI)
This setup ensures that ODI can properly interact with the Snowflake database for data extraction, transformation, and loading (ETL) processes.
Configuring the connection details for the Snowflake database:
- Database Catalog: SOC_FIN_SYS
- Schema Name: PUBLIC
- Default settings for journalizing, errors, integration, and temporary indexes are also being defined.
Associating specific naming conventions for character encodings, object masks, and sequence masks.
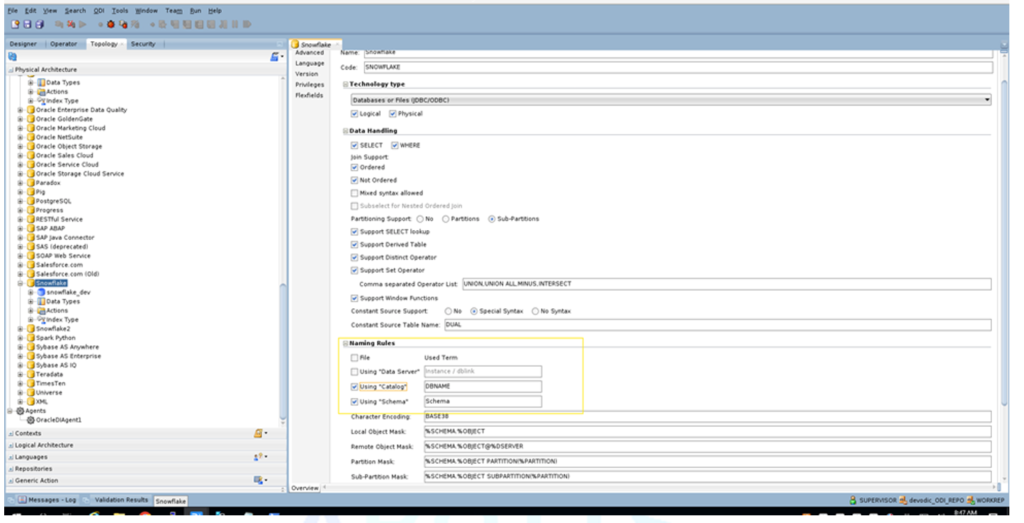
Configuring Snowflake Data Server in Oracle Data Integrator (ODI) and Setting the Naming Rule for Instance/DBLink
Configure Naming Rules
Locate the Naming Rules section, as shown in the screenshot.
Define the following fields under “Naming Rules”:
Instance/DBLink: This field maps to the Snowflake Account Identifier.
This value should match the hostname or account identifier used in the JDBC URL.
Catalog: The catalog corresponds to the Snowflake Database Name.
Schema: The schema represents the Database Schema within the catalog.