 Upworks Inc partners with ABOTTS to build their Oracle Cloud Infrastructure (OCI) and migrate their custom applications to OCI.
 Abotts Inc Partners with Gnorth consulting to deploy exadata and ODA for a large public sector customer.
Set Up Ansible with SSH
1. About Ansible:
Ansible is an open-source IT automation engine that automates
- Provisioning
- Configuration management
- Application deployment
- Orchestration
and many other IT processes. It is free to use, and the project benefits from the experience and intelligence of its thousands of contributors.
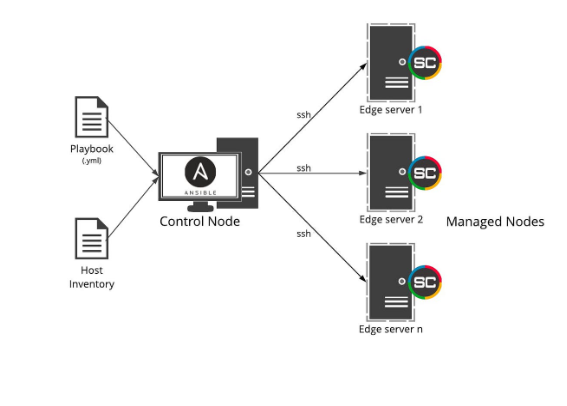
Ansible working:
Ansible is agentless in nature, which means don’t need to install any software on the manage nodes.
For automating Linux and Windows, Ansible connects to managed nodes and pushes out small programs called Ansible modules to them. These programs are written to be resource models of the desired state of the system. Ansible then executes these modules (over SSH by default), and removes them when finished. These modules are designed to be idempotent when possible so that they only make changes to a system when necessary.
For automating network devices and other IT appliances where modules cannot be executed, Ansible runs on the control node. Since Ansible is agentless, it can still communicate with devices without requiring an application or service to be installed on the managed node.
2. Installing Ansible.
Prerequisite steps:
-> Control node requirements:
- For the control node (the machine that runs Ansible), it can use nearly any UNIX-like machine with Python installed. This includes Red Hat, Debian, Ubuntu, macOS, and BSD.
- Windows under a Windows Subsystem for Linux (WSL) distribution. Windows without WSL is not natively supported as a control node.
-> Managed node requirements:
The managed node (the machine that Ansible is managing) does not require Ansible to be installed, but requires Python to run Ansible-generated Python code.
Step 1: Update the System
Ensure the system is up-to-date.
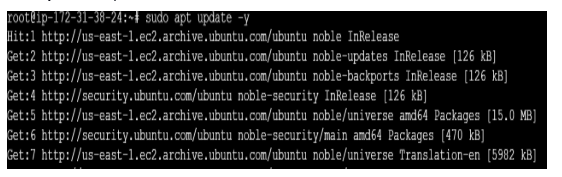
Step 2: Install Ansible
Now, install Ansible using the apt package manager.
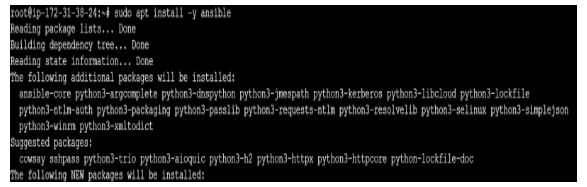
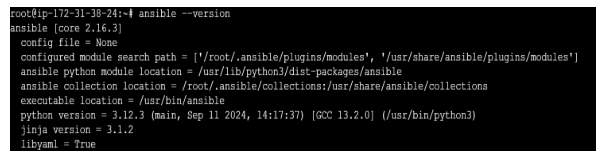
Step 3: Verify the Installation
Check if Ansible is installed correctly by verifying its version.
3. SSH Authentication and Key Management Commands
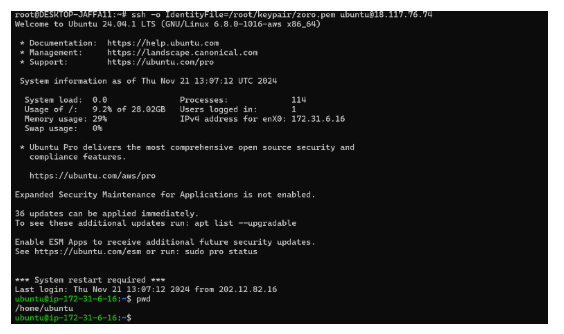
1. Connect to a Remote Server Using a PEM File:
Usage:
ssh -o IdentityFile= /path/to/keypair file username@remote_server_ip
Description:
This command connects to a remote server using a specific private key file (.pem) for authentication.
Parameters:
- -o IdentityFile /path/to/keypair file: Specifies the private key file to use for the connection.
- username: The username for the remote server (e.g., ubuntu).
- remote_server_ip: The IP address or hostname of the remote server.
Purpose:
-> Useful when the private key file is not stored in the default location (~/.ssh/id_rsa).
-> Avoids manually moving the private key into the SSH default directory.
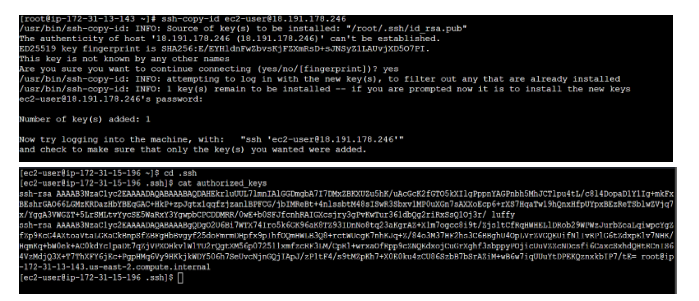
 2. Passwordless Authentication:
Usage:
ssh-copy-id username@remote_server_ip
Description:
This command copies your public SSH key to a remote server, enabling passwordless authentication for future connections.
Parameters:
- username: The username for the remote server (e.g., ubuntu).
- remote_server_ip: The IP address or hostname of the remote server.
How It Works:
-> The public key (id_rsa.pub) from your local machine is appended to the ~/.ssh/authorized_keys file on the remote server.
-> After setup, the private key on your local machine is used to authenticate future SSH connections automatically.
Purpose:
-> Simplifies login processes.
-> Eliminates the need to repeatedly enter passwords.
Configuration in Manage Node:
-> Steps to Edit SSH Configuration:
sudo vi /etc/ssh/sshd_config
sudo: Grants administrative privileges to edit the file.
vi: Launches the vi editor to open the file.
/etc/ssh/sshd_config: The configuration file for the SSH server.
![]()
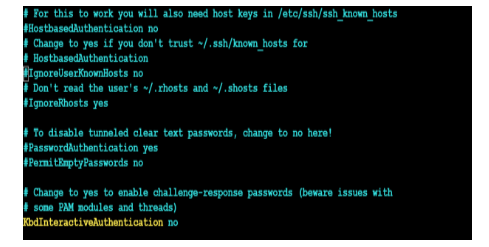
-> Enable Password Authentication:
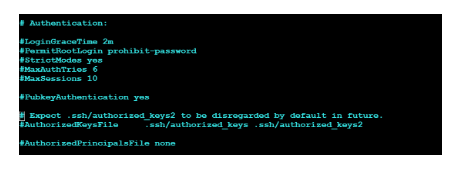
Find the PubkeyAuthentication
#PubkeyAuthentication yes
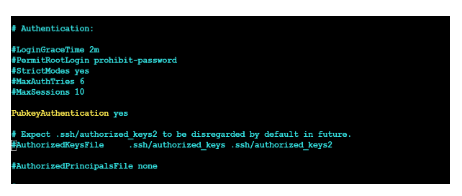
Uncomment it by removing the # and ensure it says:
PubkeyAuthentication yes
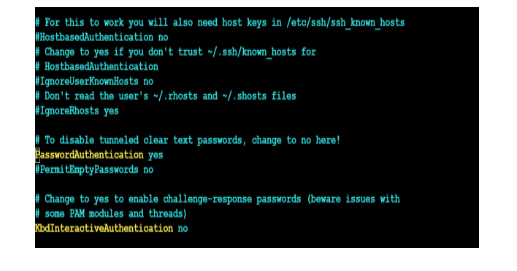
-> Find the line:
#PasswordAuthentication yes
Uncomment it by removing the # and ensure it says:
PasswordAuthentication yes
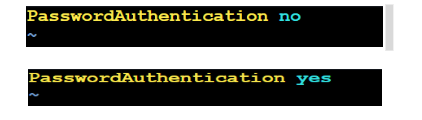
-> Edit the /etc/ssh/sshd_config.d/60-cloudimg-settings.conf file:
- This step is only required on Ubuntu Linux or Debian Linux
- The file /etc/ssh/sshd_config.d/60-cloudimg-settings.conf exists on certain cloud-based Linux instances as part of a modular configuration approach to manage SSH settings.
-> Find the line:
PasswordAuthentication no

-> Change into no to yes:
PasswordAuthentication yes
-> Restart the SSH daemon ( ssh(debian) or sshd(redhat) ) on the Machine.

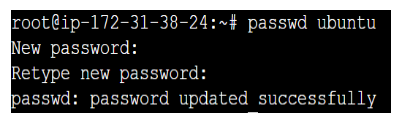
-> Create or modify a password on the manage node machine:
When you use ssh-copy-id for the first time to set up passwordless SSH authentication, it will ask for the password of the Manage node to which you want to connect. If the user does not have the password or you want to change it. You can create or modify using the passwd command.
-> Copying the SSH key to the manage node:
The command ssh-copy-id username@publipaddress is used to copy your SSH public key to the remote machine with the IP address and associate it with the user. This enables passwordless authentication for future SSH logins to that remote machine.
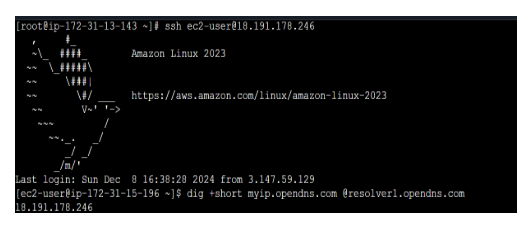
3. Connecting the manage node using ssh username@remote_host :
Usage:
ssh username@remote_host
The command ssh username@remote_host is used to initiate an SSH (Secure Shell) connection to a remote server with the following details:
Description of the command:
- ssh: This is the command used to start an SSH session, which allows you to securely access a remote machine over a network.
- user: This is the username on the remote machine you want to connect to. In many cloud environments like AWS EC2 instances running Ubuntu, the default user is typically Ubuntu.
- remote host: This is the IP address of the remote machine you want to connect to. It is a public IP address assigned to the server (in this case, a cloud instance like AWS EC2) that you wish to SSH into.
How ssh username@remote_host command works:
- Initiate Connection: It attempts to establish an SSH connection to the remote server with the user with the IP address.
- Authentication:
- i) If you’ve set up passwordless SSH authentication using an SSH key, it will automatically use your local private key (e.g., id_rsa) to authenticate.
- ii) If you are using password-based authentication, you will be prompted to enter the password for the Ubuntu user on that remote machine.
- Remote Shell Access: Once authenticated, you’ll have command-line access to the remote server and be able to run commands as if you were physically logged into that machine.