 Upworks Inc partners with ABOTTS to build their Oracle Cloud Infrastructure (OCI) and migrate their custom applications to OCI.
 Abotts Inc Partners with Gnorth consulting to deploy exadata and ODA for a large public sector customer.
Managing Users and User Groups in OCI
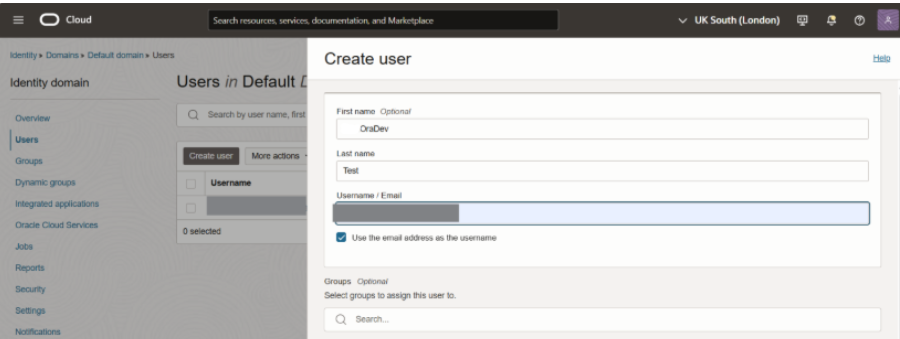
Create User
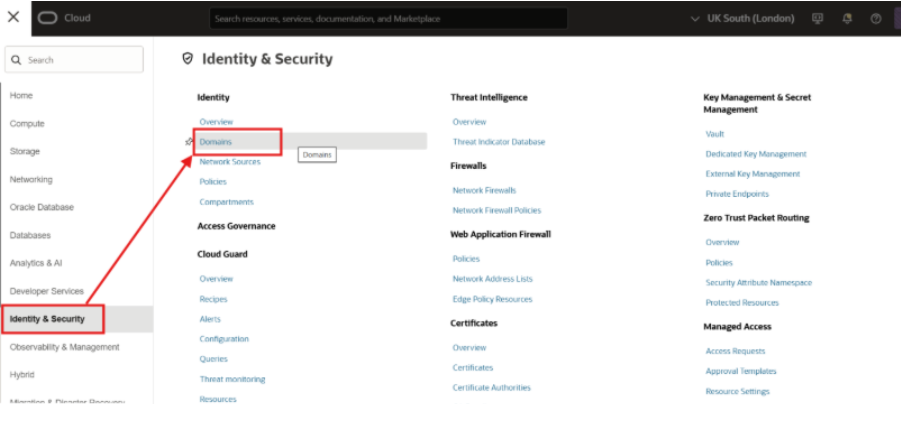
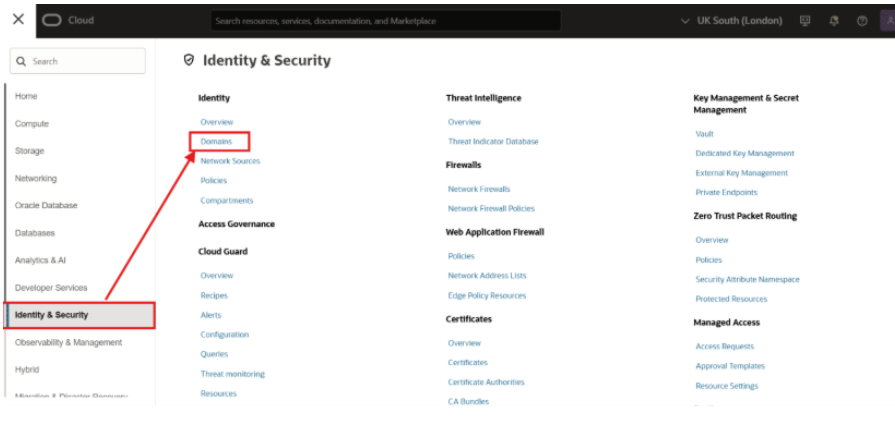
To create an user, login to OCI console using an user having identity domain administrator or user administrator role. Then navigate to Identity & Services > Domains. You can also navigate to Identity & Services > Identity > Users.
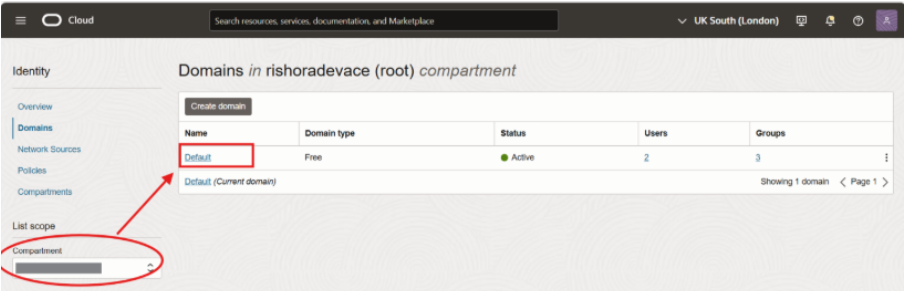
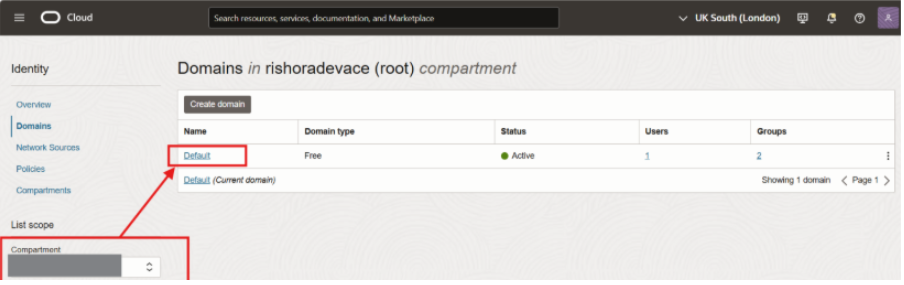
Select the compartment. And then click on the domain in which you want to create the user.
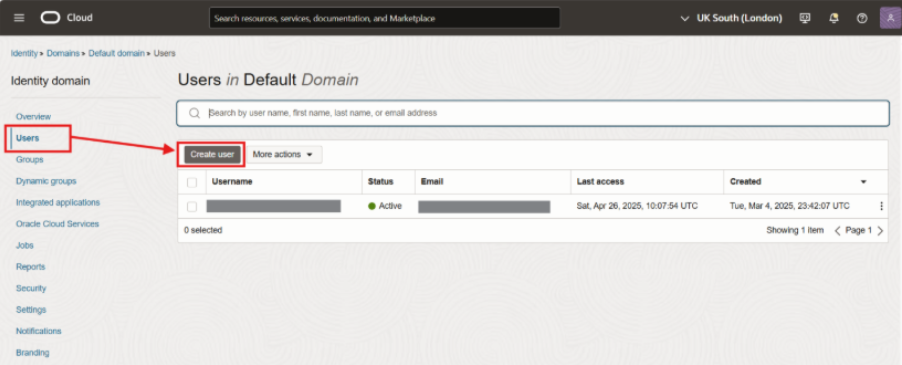
In the domain details page, click on Users. And then click on the Create user button.
Type in the First Name and Last Name of the user. And then enter the user Email in the field Username/Email. Once entered, click on Create.
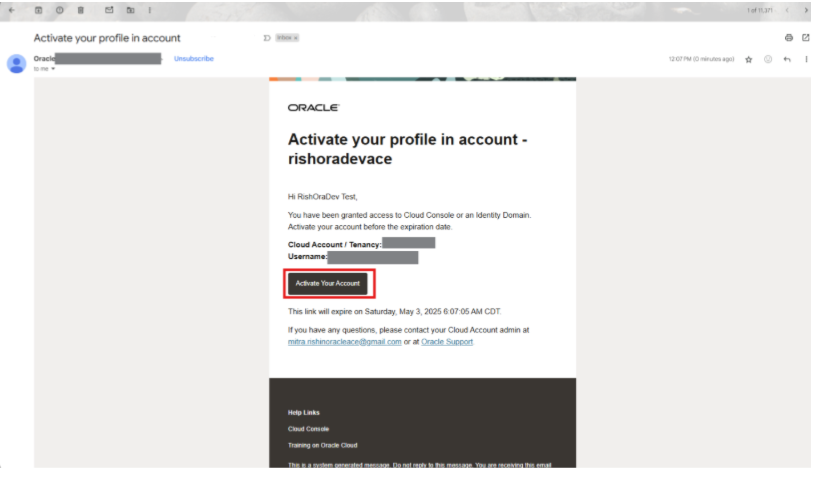
The user creation is successful. The user should get an email to Activate the user profile in the email address used in the previous step. User should click on the Activate Your Account link and set the password to active the user profile.
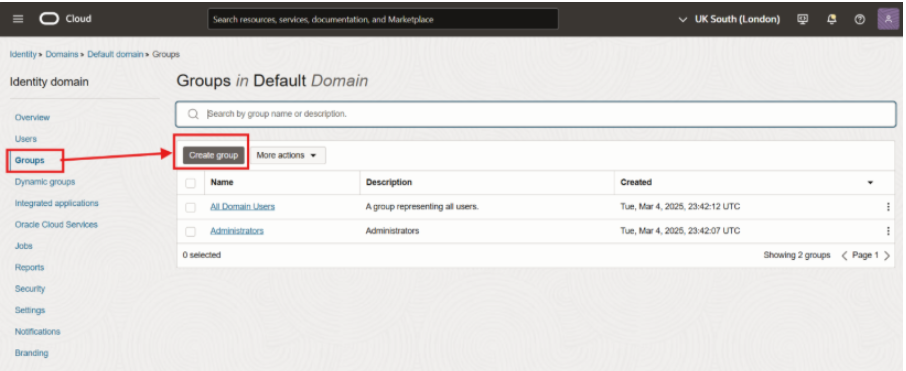
Create Groups
To create an Group, login to OCI console using an user having identity domain administrator or user administrator role. Then navigate to Identity & Services > Domains.
 Select the compartment and a list of Domains would be displayed. Click on the domain in which you want to create the group.
Under Groups, click on Create group.
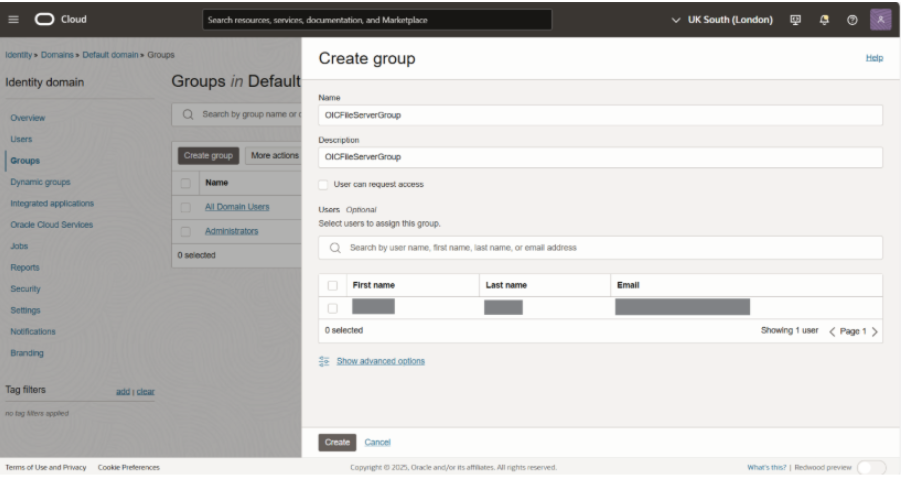
Type in a valid Name and Description for the group. Optionally, you can search and assign users to the group at this stage. However, you can assign users later, which we discuss later in the post. Click Create.
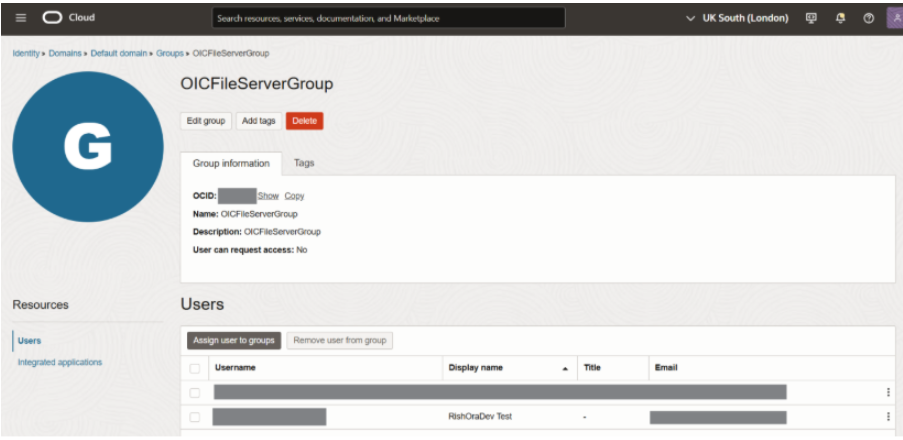
Manage Group Assignment
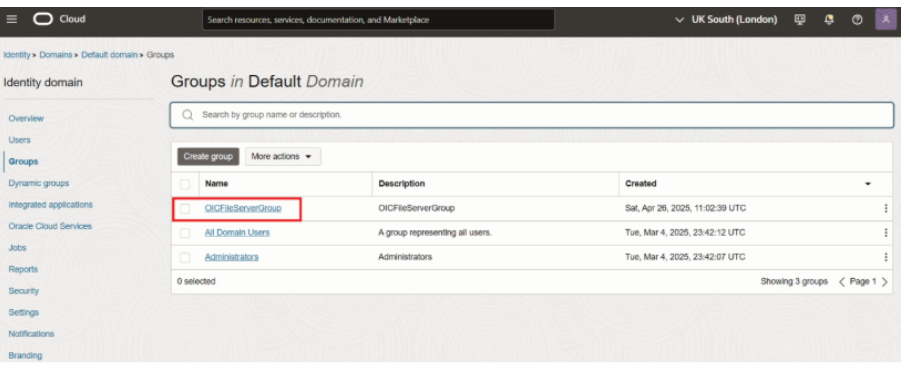
To assign Users to a pre-existing group, under Groups, click on the group to which you want to assign the user.
In the group details page, click on Assign user to groups.
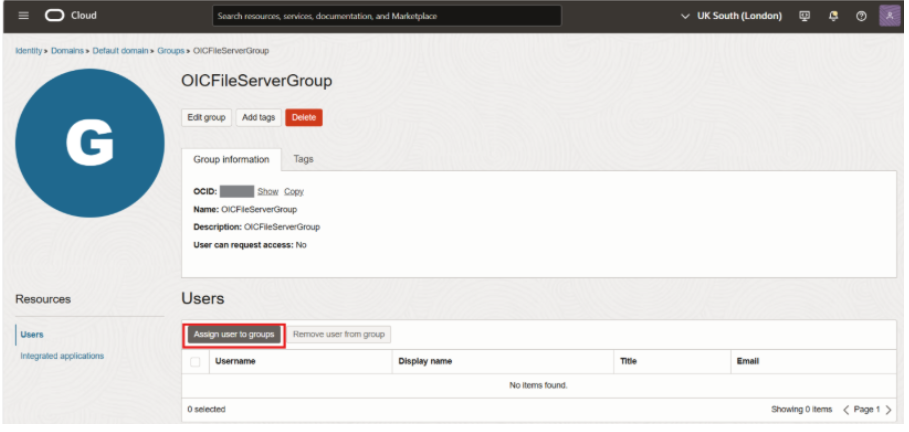 The Add users page opens. Search and add the users as necessary.

Click Add. You should now see the users listed in the group details page.